Cloth Training Pants

4 Trainers Framed

This past month while grocery shopping at Costco, I became ill. Among my list of needed items were 3 different boxes of diapers together totaling $100.00.

I am traditionally a cloth diaper user. I believe in the savings and environmental benefit. I have used the same set of Bum Genius diapers for a span of four years or more on my three daughters. These have held up great through the years, but alas they finally met their end this past year. They were last graced by the bum of my three year old, who hasn’t worn them for months. She’d grown agitated with the way they fit her busy body and I’d grown agitated with their deteriorating state. So they have been boxed.

I had high hopes for transitioning smoothly from these to underwear with quick potty training. When training wasn’t so quick, I resorted to the ease of paper pull ups for my own sanity.

While standing in Costco, I came to realize that my sanity was costing me a pretty penny. I needed a box of  regular store brand paper diapers to put my three year old in at night. I also needed a box of regular store brand diapers in a newborn size to see my unborn baby through until she is big enough to fit the new cloth diapers I have waiting for her. Neither of these purchases much bothered my frugal senses.

It was those darn pull ups that I had been purchasing every few weeks that made me ill. I knew of a remedy, but it too would be costly. I stood and asked myself, “Should I invest precious time and money into sewing cloth training pants?” I knew the sacrifices required in answering yes. It would mean hours of designing and sitting at my machine. It would also mean some initial investment. I ultimately decided that the wise thing to do would be to make these sacrifices in order to save the family money.

Training Pants Pattern

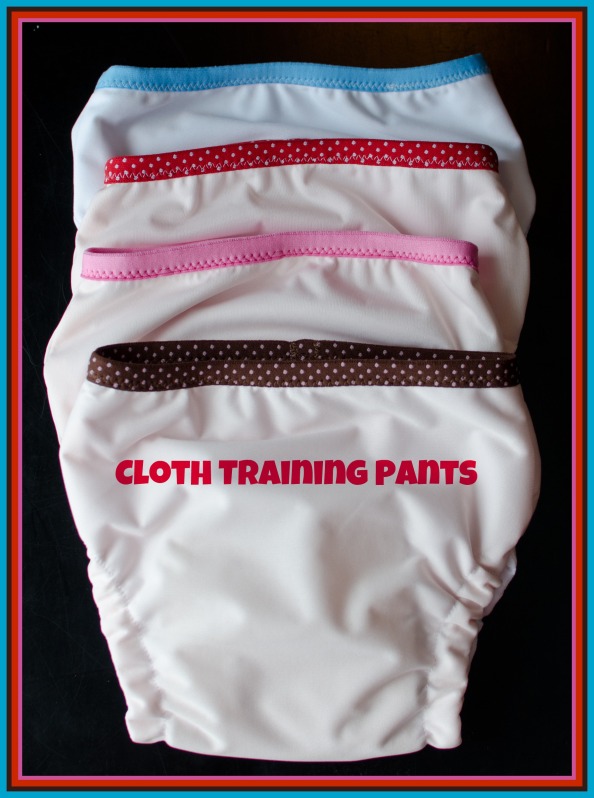
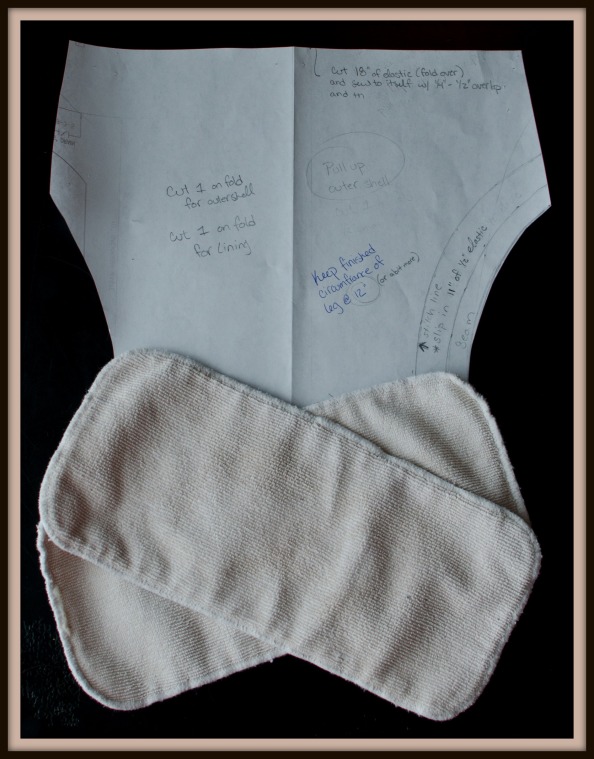
Since I had enough sense to save the absorbent inserts from my old cloth diapers, the materials I needed to make a set of 7 training pants only cost me around $50 total. Which is the equivalent of a bulk box and a half of the paper pull ups I had been consistently purchasing. I measured my little three year old and used my the shells to my old Bum Geniuses as guides to design my own pattern. After a test run and some tweaking, I had something simple I could mass produce.

I used wick-able stay dry material for the lining and pull fabric for the outer shell. Of course my favorite piece was a notion that I had never used before, but always wanted to try . . .fold over elastic. I was so excited to find these adorable colors to liven up my daughters new pants with! They turned out to be incredibly easy to sew with too.

I purposefully used the thin extra insert from my old cloth diapers as opposed to the thick heavy ones. After a few days of my three year old wearing them, my predictions rung true. A lighter insert was absorbent enough to soak up a light leak, but not enough for a full flow (if you know what I mean). I wanted this. I wanted my daughter to be uncomfortable about wetting herself (down to her socks sometimes) so that she would recognize what an accident was. These training pants provide only enough absorbency for well . . .training. They are certainly not leak proof and hopefully that will speed up the process of getting her potty dependent and permanently in big girl underwear.

So far I have put these new training pants through several washes and they are holding up great. They are also forcing me and my little girl to committing to the potty training process. The paper pulls ups gave us too much room for laziness, since they behaved much like a regular diaper in absorbency. Lord willing I will have number three potty trained soon and only number four to be born will require diapers!
A Cornucopia Haiku

Image

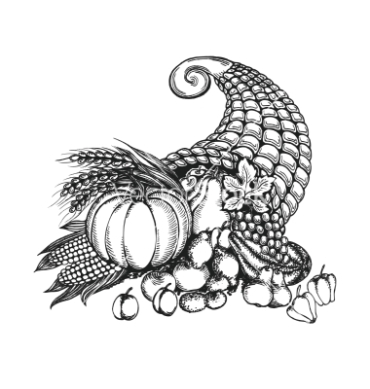
For Thanksgiving this year I will be teaching my girls about cornucopias. In my research I have learned a lot. I was expecting these to tie into the American Thanksgiving story, but their origin is much older than that. I discovered they are explained in a Greek mythology depicting baby Zeus accidentally breaking off his nursemaid’s (a goat goddess) horn, which in turn poured forth bounty eternally. I found that many historical paintings and statues depict Greek gods or powerful figures holding cornucopias as a sign of plenty. In fact the word cornucopia means “horn of plenty” in Latin.

Even though I intend to give my girls the full truth behind these horns, which have been Americanized into weaved wicker and false fruit decor. I wanted to highlight our faith in the Lord our King and Creator above all. So in a creative moment on this Saturday afternoon a haiku was born. I wrote the following to highlight where true bounty comes from. It’s simple, it’s fun, and I think just right for my second grader and kindergartener.

A Cornucopia Haiku

By: Christina K. Cappon  2013

  There is a large horn,

spilling great bounty for all

who have sincere need.

There are red apples,

quenching thirst with life giving

juice buried inside.

There are green pears,

sitting in misshapen squats,

with freckles abroad.

There are orange pumpkins,

who’s stems droop falling asleep,

dressed in lumps and bumps.

There are purple grapes,

small all huddled together

like sweet family.

There are yellow corn,

peeping out of hairy husks

ready to be seen.

There are brown walnuts,

with stubborn shells to be cracked

for reward inside.

There is a large horn,

spilling great bounty for all

who have sincere need

God holds this large horn,

as a ready offering

for all His children.

It is the Lord God

who holds all bounty in hand

as creator king.

His love pours freely

and His promised provision

for those who fear Him.

Reach forth to take hold

of God’s blessing and goodness

his bounty for all.

Receive your good choice,

apple, pumpkin, pear, or corn

grape and walnut too.

Give thanks to the Lord,

creator and provider

for your sincere need.

 I intend to tie this little lesson in with a Thanksgiving placemat craft. You will have to watch my blog to see how I tie that in and how they work out!

Pumpkin Cycle Spinner Plates

Spin the Cycle Title Photo

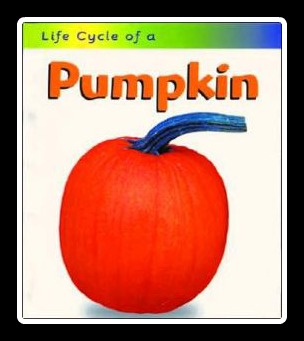
I love it when my girls and I “stumble” upon education. We were at our local library a while back checking out books. Lord love those librarians who display seasonal reads atop their shelves! Staring at me eye level was the book “Life Cycle of a Pumpkin” and I picked it up. To my surprise, when we got home, my girls wanted me to read it over and again. They were enthralled.

Book

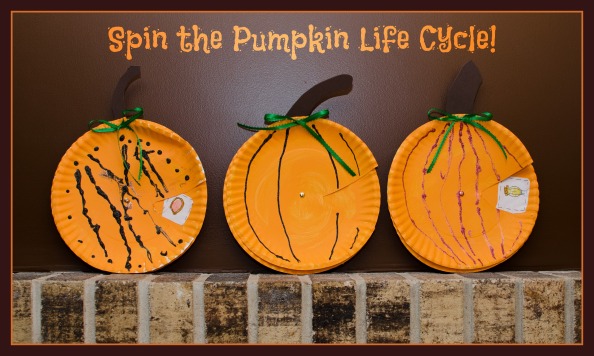
I decided to encourage their excitement towards this fall topic and develop a craft that would dedicate the life cycle of a pumpkin to their memories. Thus our Pumpkin Cycle Spinner Plates were born! It’s a very simple, very cheap, and very fun project.

pumpkin supplies

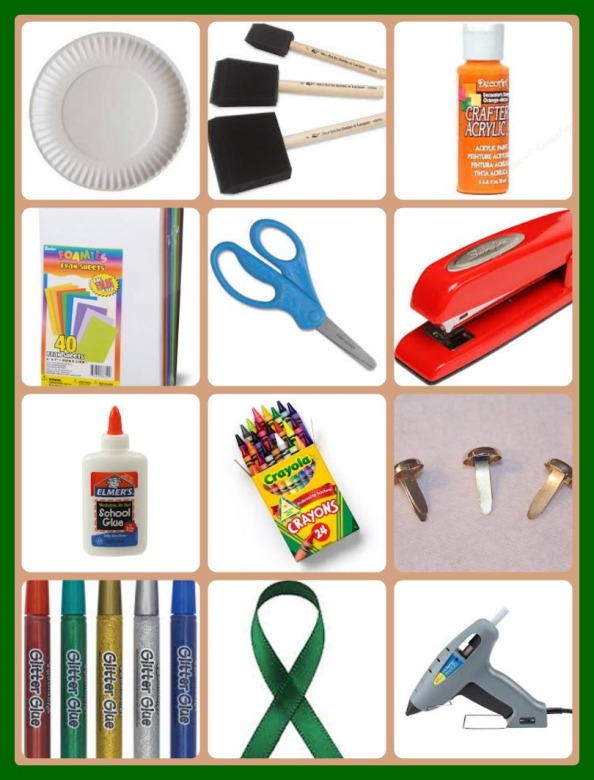
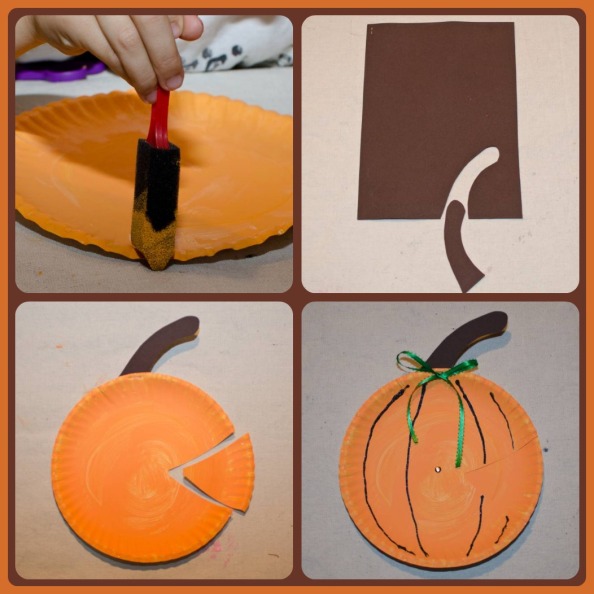
The following supplies are needed for each student for this craft, two paper plates, a sponge brush, orange paint, a brown foam sheet, scissors, a stapler, glue, coloring utensils, a craft brad, glitter glue, green ribbon, and a hot glue gun. Of course some of these may be omitted for a simpler version.

To start our pumpkins, I dressed my girls in their worst clothes and let them go paint happy on their paper plates. To their delight, they were instructed to cover every inch in orange. Afterwards, as these were laid aside to dry, they each cut out a stem for their pumpkin from a brown foam sheet, which I later stapled to the back of the top plate.

Cutouts

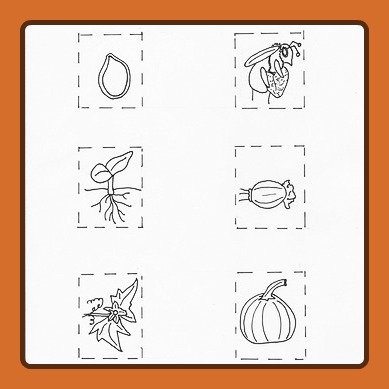
Next I handed my girls a sheet of images depicting the steps in the life cycle of a pumpkin to color and cut out. Since I had a hard time finding the images I wanted online, I was forced to draw and copy my own. I will definitely be saving a master copy for the future!

Pumpkin Steps

After those were done and the plates were dry, I traced out a small triangle on the side of the top plate for my girls to cut out. This would act as a window. Then I laid the top plate over the bottom plate and lightly marked six x’s on the bottom plate with a pencil to direct them where to glue on their images. Once the order of those images were double checked and the glue was sufficiently dry, I placed the top plate back over the bottom plate and poked a hole through both dead center using a pencil. This was where I secured a small brad , which gave us the spin we wanted. The bottom plate could be turned round and round, windowing one step in the life cycle of a pumpkin at a time!

To add a little pizzaz, we also glittered lines on the face of the pumpkin and added a green bow over the staple holding the stem in place, using a hot glue gun.

Spin the Cycle Title Photo

The best part about this educational craft is that my girls get the opportunity not only to show off their art to anyone and everyone, but also explain the life cycle steps of a pumpkin that they learned.

A is for Apples!

Apple Pickin' Tree Collage

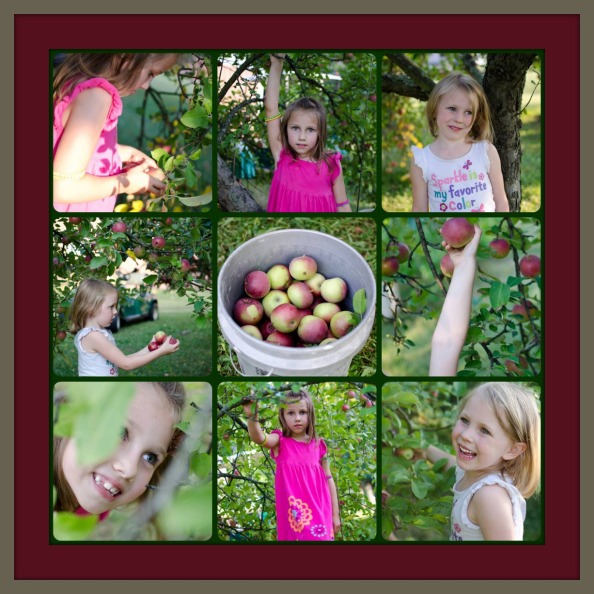
Thanks to the Werkema’s generosity, we were treated to our first apple picking experience in their mini backyard orchard. It was a blast! The apples were literally falling off the trees. Of course one of my girls was more interested in their dog than helping us to fill our buckets.

Applesauce Collage

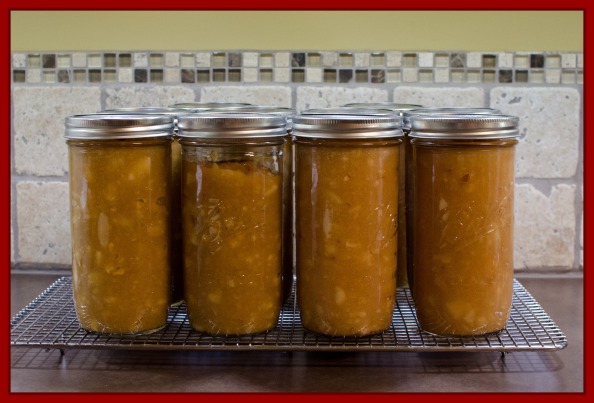
For about two days my mother and I made a mess in the kitchen striving for applesauce. From the very first peeled apple my senses were delighted and my mind drifted off to happy places of coffee house ciders and caramel apple treats. It was a tease for both nose and stomach for this poor pregnant woman!

Though it was not my first canning experience, it was my first apple experience. My mother wisely invested in a tool that peels, cores, and slices apples. This handy little thing saved us HOURS! I would recommend it to anyone. My mother chose to make a few chunky batches of sauce, but for the bulk of our apples we used a food mill for a traditionally smooth sauce. Of course almost every batch was honored with a dash of cinnamon and nutmeg! Can fall get any better?

Cans!

The finished product can be so incredibly rewarding after a hard days canning. I only wish my entire family could enjoy my enthusiasm. Unfortunately only two out of my three girls will eat apple sauce and not too readily. Oh well at least my husband and I know and follow the apple a day rule 🙂

Cuneiform Tablets

Cuneiform Collage

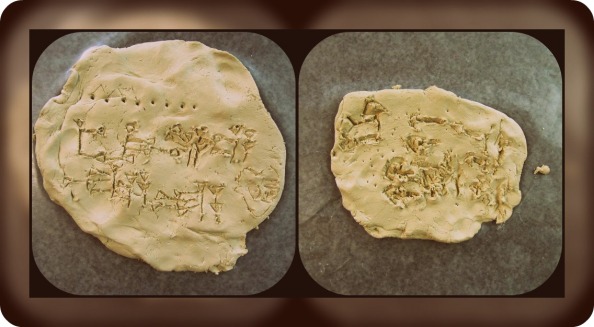
I am introducing my girls to World History this year and am learning so much personally! I had to give a lesson on the first civilization Sumer and the information was heavy and detailed for their level. I never fear offering too much however, because I know some is getting absorbed and the subject is sure to be repeated years later. I did want to engage them in a project to help them relate to the subject and hopefully commit some of what we learned to memory. One of the ways Sumer developed as a civilization was through their written language cuneiform. When I surveyed some examples of this writing and noted it’s simple lines and triangle shapes, I knew it was perfect thing to engage my girls with. I decided we would simply mimmic ancient scribes by molding tablets out of clay and pressing these shapes into them. I found the alphabet on the internet and what you see here is my girls attempts to write their names. The left is my second grader’s and the right is my kindergartener’s. Not bad huh?

Manna Makin’

Image

My second grader Keeley is studying Moses and the Israelites this fall for Bible. One of the projects in her curriculum was to make your own manna. How fun! This was a great opportunity to steal my dear daughter away from all those monotonous worksheets and enjoy some hands on learning.

Image

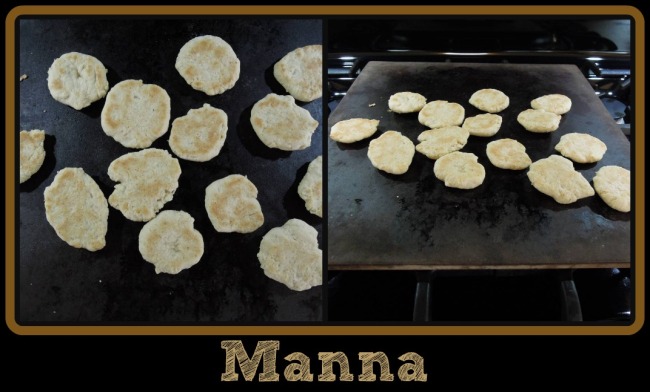
These are the ingredients we used. We basically threw them all into a giant bowl, stirred them up with a spatula until it came together, and then kneaded it slightly on a floured surface. I let Keeley get as messy as she darn well wanted. After all this wasn’t our family dinner. Once the dough was kneaded we separated it into uniform balls which we flattened out into disks. A few minutes in a 350 degree oven on a pizza stone and they were ready! This recipe gave quick return for your work, which is good when including eager impatient children.

Image

The Bible tells us that God’s “Rain from Heaven” tasted sweet like wafers with honey. Well I have to say that ours tasted sweet as well. The manna was very subtle and pleasing on the pallet. Our whole family gobbled them up in 5 minutes flat, including Daddy!

Lace Sweater Sleeve Applique

Lace Sweater Posed

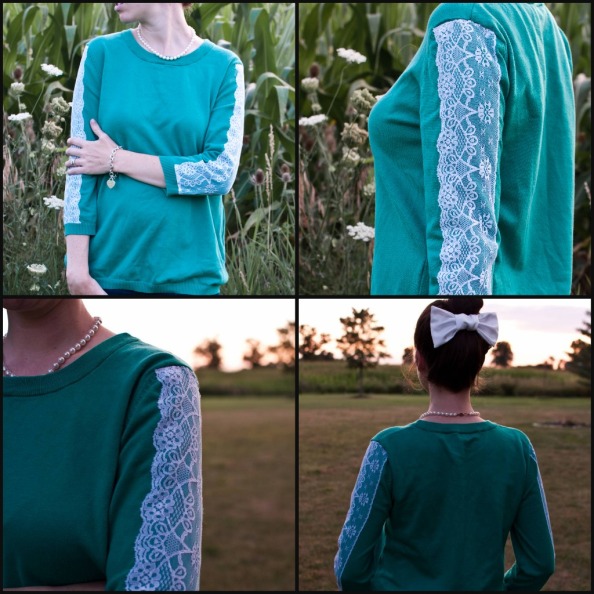
I am expecting my fourth child in February 2014 and am in desperate on some cute as well as cheap maternity clothes. To solve this problem I went shopping at a local goodwill store and found an oversized sweater that would accommodate my soon to be enlarged belly very nicely. However the sweater was very “blah” to the eye, a never ending sea of green. It needed work. I decided to add a lace applique along each sleeve line to jazz it up. The lace partnered with a string of pearls around the neck and a bow in the hair made this $7 recycled sweater a feminine maternity wonder! Here’s how I did it  .  .  .

Lace Sweater Step 1

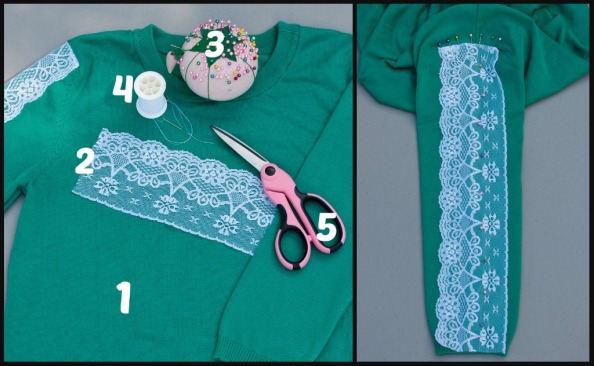
You need five things for this project. The first of course is the sweater or sweatshirt that you would like to recreate. The second is lace from a local fabric store. I literally walked my sweater into the store to measure how many yards I would need to purchase. The last thing you will want is to be an inch short of your cuff! The third thing you will need is a set of sewing pins to hold your lace in place  ( “lol hey I just rhymed!”). The fourth thing is thread that matches your lace and a sewing needle. The fifth and last thing you will need is a pair of scissors.

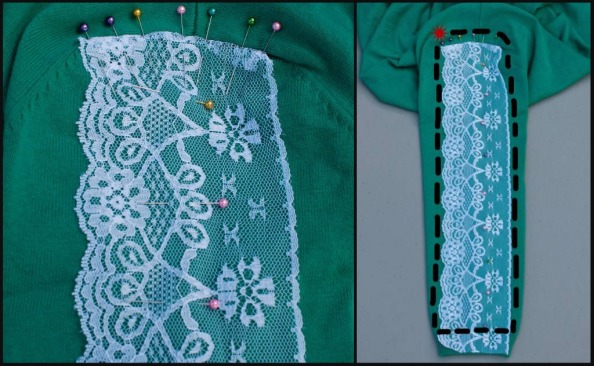
To begin, lay out your sleeve and guesstimate how long to cut your lace. Leave yourself a little extra on the edge of the cuff to play it safe. Then determine how you will want your lace to lay. I placed mine directly center over the fold line of my sleeve ( a straight line from mid shoulder to mid wrist). I also took notice that my lace was straight on one side and scalloped on the other. I decided to face my straight edge towards the back of the sweater and the scalloped edge towards the front. Once you are pleased with your placement, start pinning. There really is no rhyme or reason to how you should pin, just make sure that your lace cannot move. You will however want to pay close attention to the shoulder. This is where I chose to tuck my lace under about 1/8″ – 1/4″ and give it a neat and professional look. Pins were very necessary here to hold in that tuck!

Lace Sweater Step 2

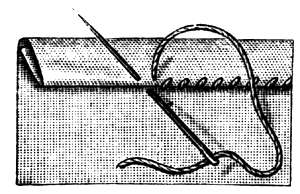
Once you have the lace secured with pins, you are ready to start stiching. I chose to use a hem stitch for attaching the lace to the sweater. If you are unfamiliar with that particular stitch, you can study the diagram below. Begin at the top left side of the shoulder (shown on the picture with a red star) and work your way over and downward. Once you hit the cuff, carefully trim the lace leaving yourself 1/8″- 1/4″ to tuck under. You may tuck under and pin the cuff edge in place at this point or simply tuck as you stitch along. Once the cuff is complete, continue your stitching all the way back up to the beginning point. Then VOOLA one sleeve is done and you have only one more to go!

This is such a quick, easy, and inexpensive way to jazz up a bland piece in your wardrobe. A girl can never have too much lace right?

Hem Stitch

Continue reading